-

Qualtrics Platform -

Customer Journey Optimizer -

XM Discover -

Qualtrics Social Connect
Importing a CSV as a CX Dashboard Source
About Importing a CSV as a CX Dashboard Source
Sometimes, you may want to create dashboards for datasets you built in Excel, or pull data from another software for reporting in Qualtrics. CX Dashboards lets you upload CSV files directly into your dashboard so that you don’t have to upload your data into a survey before adding it as a source. Once mapped, CSV data sources act just like regular survey data sources.
Preparing a File for Upload
Before uploading your data file into CX Dashboards, there are a few requirements it must meet:
- Saved in a CSV format. TSV is not currently supported. Please note that CSV files do not support special characters.
Qtip: If you’re having trouble with your CSV, make sure it is UTF-8 encoded with double quotes set as the enclosure.Qtip: The Delimiter must be set to comma, not semicolon.
- One row of headers with data underneath. See below:
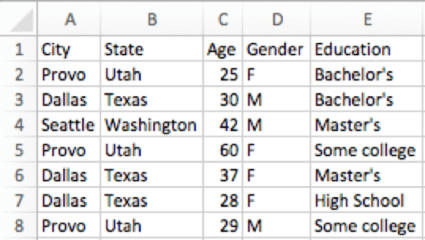 Qtip: If you are importing data from a Qualtrics survey, make sure you delete extra header rows! There should be only one row of headers.
 - A maximum file size of 100MB. If your file is too big, try deleting all blank cells by using the “find” feature in your spreadsheet editing software.
- A maximum of 10,000 records is allowed per file.
Qtip: The maximum total uploaded records for a dashboard is 10 million. The maximum total uploaded records across all dashboards for a brand is 50 million.
- A maximum of 100 columns can be uploaded by CSV per dashboard.

Uploading CSV Data
- In your dashboard, navigate to the settings menu through the gear icon.
 Qtip: Which button you have depends on the appearance of your account.
 - In the Dashboard Data tab, click Add Source.
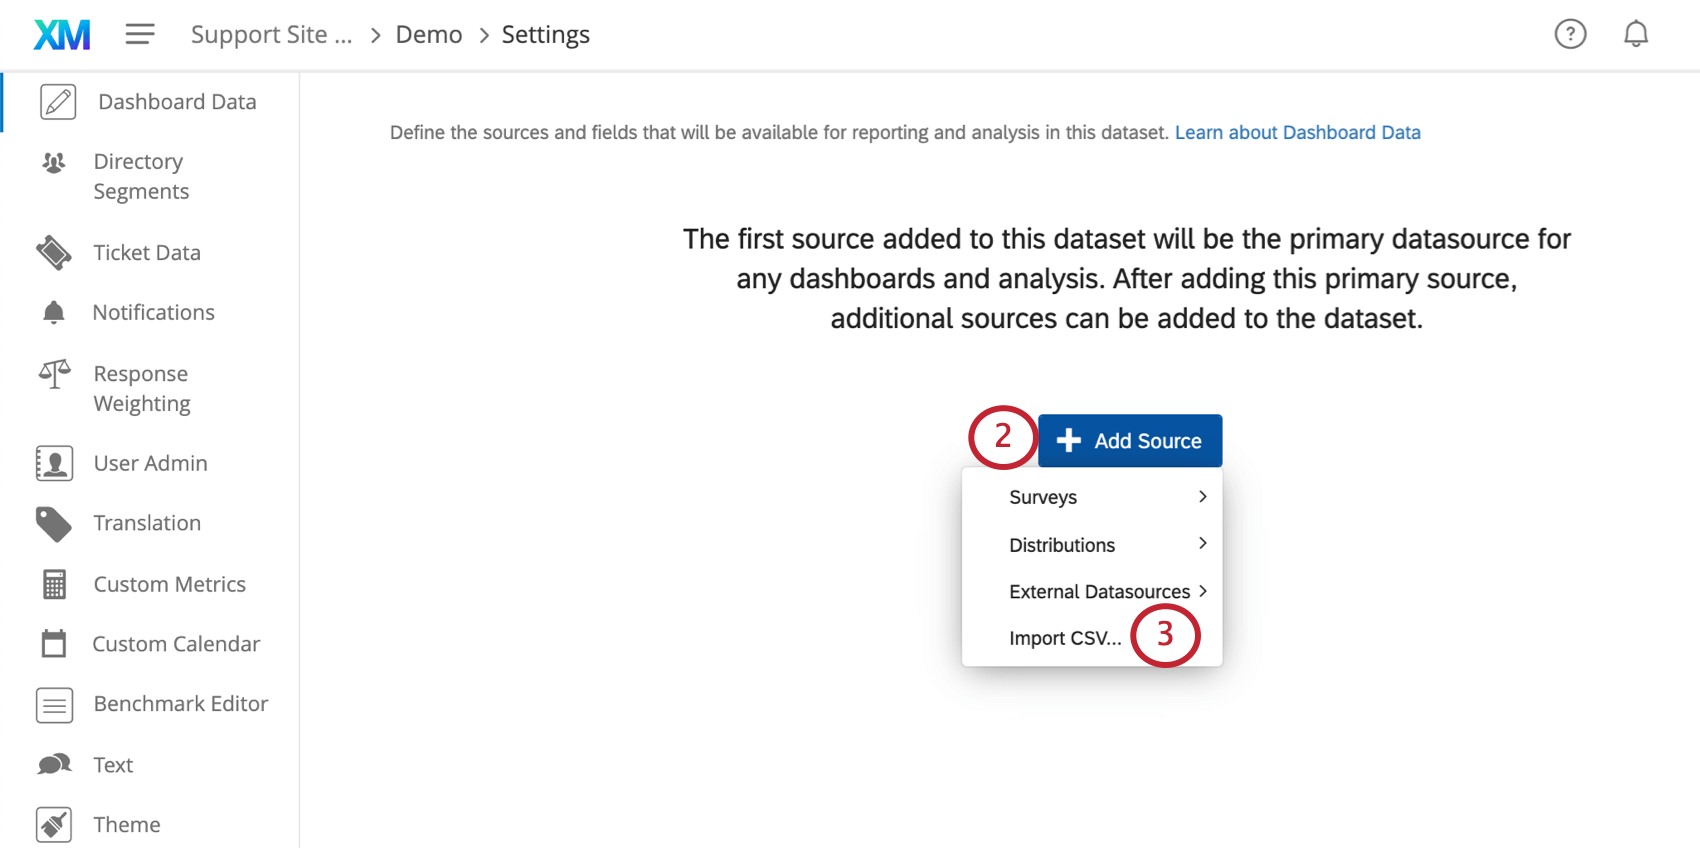
- Select Import CSV.
- Select your file.
- Double-check the preview. You can rename the source and the headers if you desire. Other errors must be corrected in the CSV.

- Click Add.
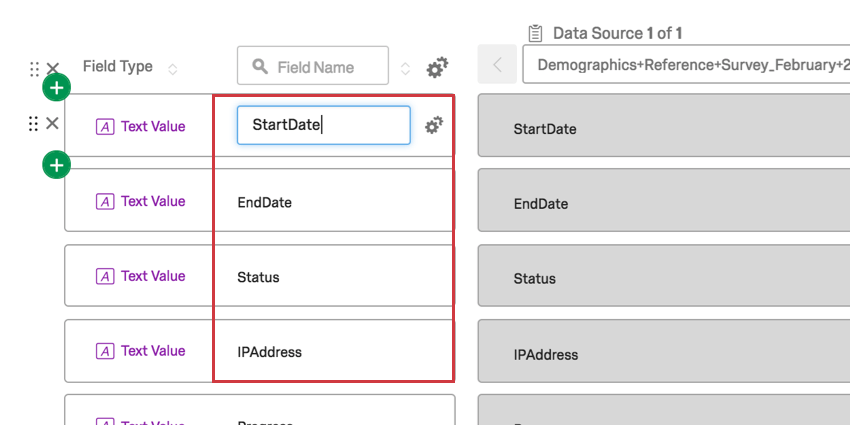
- If this is your dashboard’s first data source, the data will map automatically as a Text Values. You may need to revise the field type. If this is not your first source, you may need to adjust your mapping and add new fields.
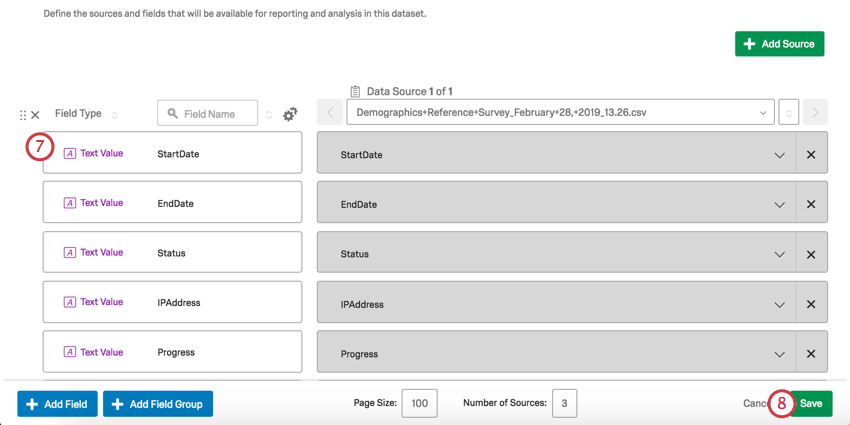
- Click Save to save your new CSV source into your dashboard.
Once CSV data is uploaded, it can be set in widgets just like any other data source in your dashboard.
If you’re running into trouble uploading your CSV source, check out the CSV/TSV Upload Issues page for troubleshooting tips.
Updating CSV Data
If more data comes in for your CSV data source, you can incorporate this into your dashboard.
Preparing a File for Updates
Any headers or data you want to retain must be formatted exactly as they were in the first upload. If you remove a row of data, this data will be removed from your dashboard.
Add additional rows for any new data you wish to include.
This update method should not be used to:
- Add additional columns. To add another column, upload a new CSV data source instead.
- Change column names. This will make the values for the variable null. Instead, change a variable name right inside the Dashboard Data tab by typing in the fields:
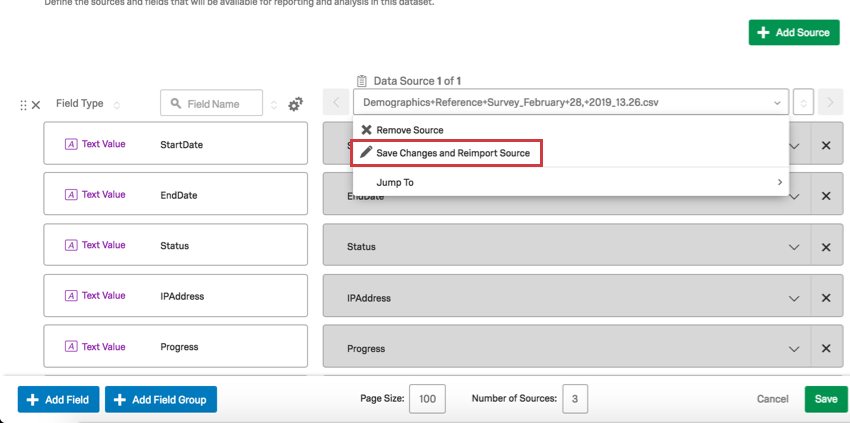
Reimporting the File
Click on the CSV source and select Save Changes and Reimport Source. Then select your file.